Accessing Azure Storage services without storing secrets using Azurite, Docker, HTTPS and Azure - Part 6
Introduction
Part 6! The final part of this slightly overblown series on how to use the DefaultAzureCredential with Azurite and Azure over HTTPS!
Welcome to this post and thank you for taking the time to read this series.
In this final part we’re going to set up the Azure resources for our blob storage, our .NET application and deploy our code. We will use managed identities to connect from our .NET application to Azure. All the while without storing any kind of access tokens or credentials in our code or environment variables (such as a connection string).
This part of the series requires you to have an Azure account with a valid subscription.
You can read the previous parts here:
Setting up Azure resources
Make sure you’re installed the Azure CLI.
Log in to your Azure account by running az login. Don’t forget to select the right subscription after logging in (if applicable).
Next up we’ll create a resource group by running az group create --location westeurope --name rg-azurite.
If you want to create a resource group in a different location or with a different name, you’re of course free to do so.
The rest of the resources will be created through Bicep. I highly recommend using Visual Studio Code with the Bicep extension from Microsoft, this makes it a breeze to author Bicep files.
Create a new Bicep file in the root folder of your project called main.bicep (~/azurite-demo/main.bicep). Once created, we’ll add our Storage Account resource definition to it.
resource storageAccount 'Microsoft.Storage/storageAccounts@2023-05-01' = {
  name: 'stazurite${uniqueString(resourceGroup().id)}'
  location: resourceGroup().location
  sku: {
    name: 'Standard_LRS'
  }
  kind: 'StorageV2'
}
Due to a storage account requiring a globally unique name, I prefer to append the hashed version of the resource group ID to it. If you prefer to use a different name, or different values for the SKU - that’s completely fine.
Next up, we’ll create the resource definitions for our .NET application. We’re going to use an Azure App Service in this tutorial. You could also use an Azure Container Instance, or an Azure Container App if you so desire.
resource demoAppPlan 'Microsoft.Web/serverfarms@2023-12-01' = {
  name: 'asp-demo-app-${uniqueString(resourceGroup().id)}'
  location: resourceGroup().location
  sku: {
    name: 'B1'
  }
  kind: 'linux'
  properties: {
    reserved: true
  }
}

resource demoApp 'Microsoft.Web/sites@2023-12-01' = {
  name: 'app-demo-app-${uniqueString(resourceGroup().id)}'
  location: resourceGroup().location
  identity: {
    type: 'SystemAssigned'
  }
  properties: {
    serverFarmId: demoAppPlan.id
    httpsOnly: true
    siteConfig: {
      linuxFxVersion: 'DOTNETCORE|8.0'
      appSettings: [
        {
          name: 'Storage__ServiceUri'
          value: storageAccount.properties.primaryEndpoints.blob
        }
      ]
    }
  }
}
I’m choosing a Linux app service plan on the B1 SKU. The web app itself will have a system-assigned identity enabled and our Blob endpoint set to the value of the Storage__ServiceUri environment variable. Note that if you wish to create a Linux app service plan, it’s important that you set both the kind value to linux as well as the reserved property to true. Additionally, make sure you set the linuxFxVersion property to the stack version you’re currently working on. For our .NET application, that’s .NET 8 (written as DOTNETCORE|8.0).
With our App Service, we’ve created a system-assigned identity. Contrary to user-assigned managed identities, system-assigned identities are managed by Azure and bound to a specific resource. For more information about the different types of managed identities, take a look at Microsoft’s documentation.
Now that we have our App Service with our system-assigned managed identity in place, we can assign a contributor role on the Blob storage for our identity. You can find a list of built-in role definitions over at Microsoft’s documentation.
resource storageAccountDataContributorDefinition 'Microsoft.Authorization/roleDefinitions@2022-05-01-preview' existing = {
  scope: subscription()
  name: 'ba92f5b4-2d11-453d-a403-e96b0029c9fe'
}

resource appServiceRoleAssignment 'Microsoft.Authorization/roleAssignments@2022-04-01' = {
  scope: storageAccount
  name: guid(storageAccount.id, demoApp.id, storageAccountDataContributorDefinition.id)
  properties: {
    principalId: demoApp.identity.principalId
    roleDefinitionId: storageAccountDataContributorDefinition.id
    principalType: 'ServicePrincipal'
  }
}
Your final Bicep file should look something like this:
resource storageAccount 'Microsoft.Storage/storageAccounts@2023-05-01' = {
  name: 'stazurite${uniqueString(resourceGroup().id)}'
  location: resourceGroup().location
  sku: {
    name: 'Standard_LRS'
  }
  kind: 'StorageV2'
}

resource demoAppPlan 'Microsoft.Web/serverfarms@2023-12-01' = {
  name: 'asp-demo-app-${uniqueString(resourceGroup().id)}'
  location: resourceGroup().location
  sku: {
    name: 'B1'
  }
  kind: 'linux'
  properties: {
    reserved: true
  }
}

resource demoApp 'Microsoft.Web/sites@2023-12-01' = {
  name: 'app-demo-app-${uniqueString(resourceGroup().id)}'
  location: resourceGroup().location
  identity: {
    type: 'SystemAssigned'
  }
  properties: {
    serverFarmId: demoAppPlan.id
    httpsOnly: true
    siteConfig: {
      linuxFxVersion: 'DOTNETCORE|8.0'
      appSettings: [
        {
          name: 'Storage__ServiceUri'
          value: storageAccount.properties.primaryEndpoints.blob
        }
      ]
    }
  }
}

resource storageAccountDataContributorDefinition 'Microsoft.Authorization/roleDefinitions@2022-05-01-preview' existing = {
  scope: subscription()
  name: 'ba92f5b4-2d11-453d-a403-e96b0029c9fe'
}

resource appServiceRoleAssignment 'Microsoft.Authorization/roleAssignments@2022-04-01' = {
  scope: storageAccount
  name: guid(storageAccount.id, demoApp.id, storageAccountDataContributorDefinition.id)
  properties: {
    principalId: demoApp.identity.principalId
    roleDefinitionId: storageAccountDataContributorDefinition.id
    principalType: 'ServicePrincipal'
  }
}
After creating our Bicep file with our resource declarations, it’s time to deploy our resources to Azure. Run the following command: az deployment group create --resource-group rg-azurite --template-file ./main.bicep. If you get errors deploying your resources, try a different resource group name.
For more information about these Bicep declarations, see Microsoft’s Bicep reference.
Of course you don’t have to use Bicep. You can use the AZ CLI, as well as the Portal or any other method you prefer!
Deploying the .NET application
Now that we have all our resources in place, let’s deploy our application to Azure. In this scenario I’ll be using the dotnet CLI to publish the application to my local file system after which I’ll be using the ZIP deploy functionality to upload it to the Azure App Service. If you wish to use a different way of deploying your application, e.g. through Visual Studio, that will work just as well.
Let’s navigate to our demo-app folder: ~/azurite-demo/demo-app. Publish the application by running the publish command with the dotnet CLI: dotnet publish --configuration Release --output ./publish
Navigate to the newly created publish folder (~/azurite-demo/demo-app/publish) and ZIP all the files in this directory: zip -r demo-app.zip ..
You might need to install
zipon your machine (sudo apt install zip -y).
Once all the published files are zipped, we can use the Azure CLI to deploy our application to our previously created Azure App Service: az webapp deploy --resource-group rg-azurite --name app-demo-app-mf53zb5hnqgto --src-path ./demo-app.zip --type zip. Be sure to replace the name of the web app with the name of your web app.
If you want to retrieve the name of your web app, you can run the following command:
az resource list --resource-group rg-azurite --resource-type Microsoft.Web/sites --query [0].name.
Wait for the command to complete and head over to your newly deployed Azure app service! You can find the URL for you app service by running this command: az webapp show --resource-group rg-azurite --name app-demo-app-mf53zb5hnqgto --query defaultHostName.
Replace the name of App Service with your app’s name.
You should see the Hello World! output from the default endpoint. Navigate to the /blob endpoint. Since this is the first time we’re looking at this endpoint, it will create the Blob container for us and show No blob item available:

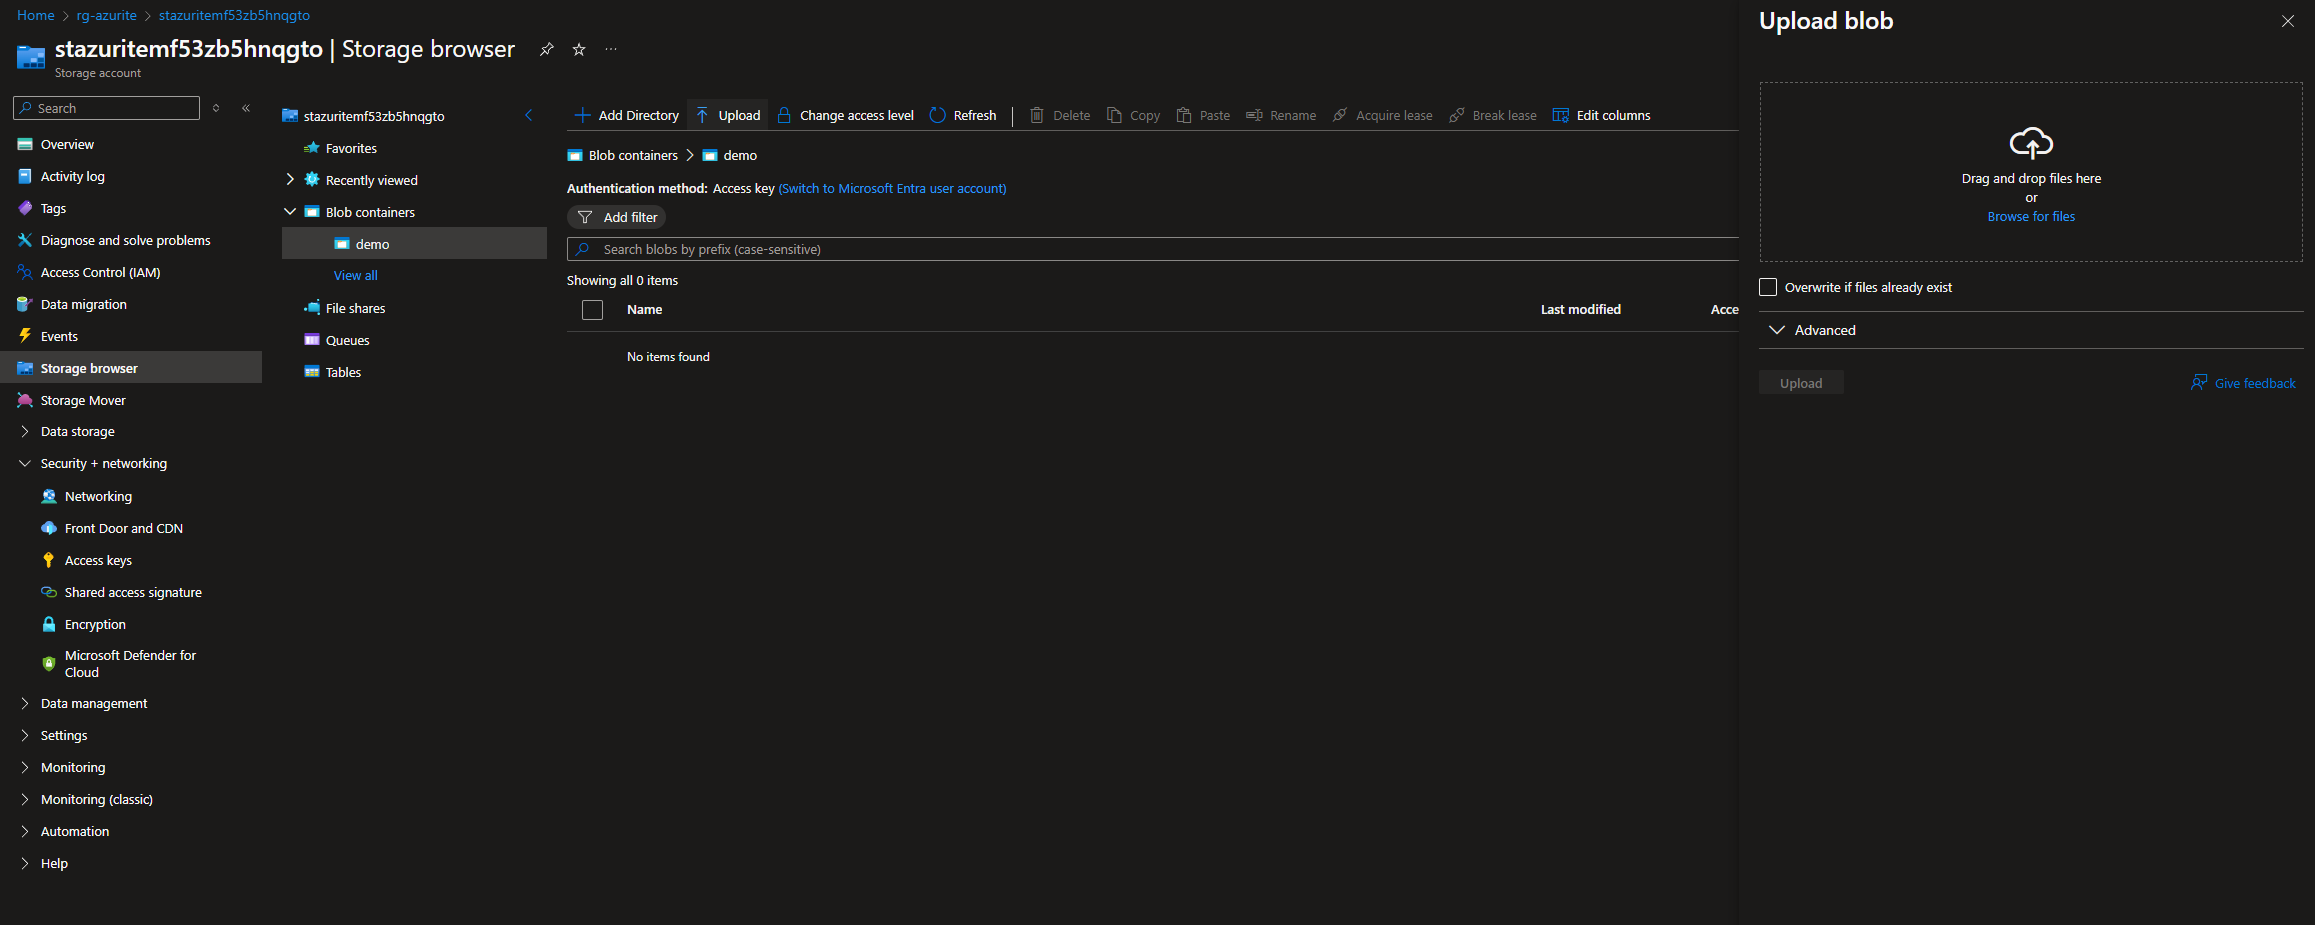
If you want you can upload an item to the Blob container using any of the preferred methods. I’ll be using the Azure Storage Explorer built-in to the Azure Portal.

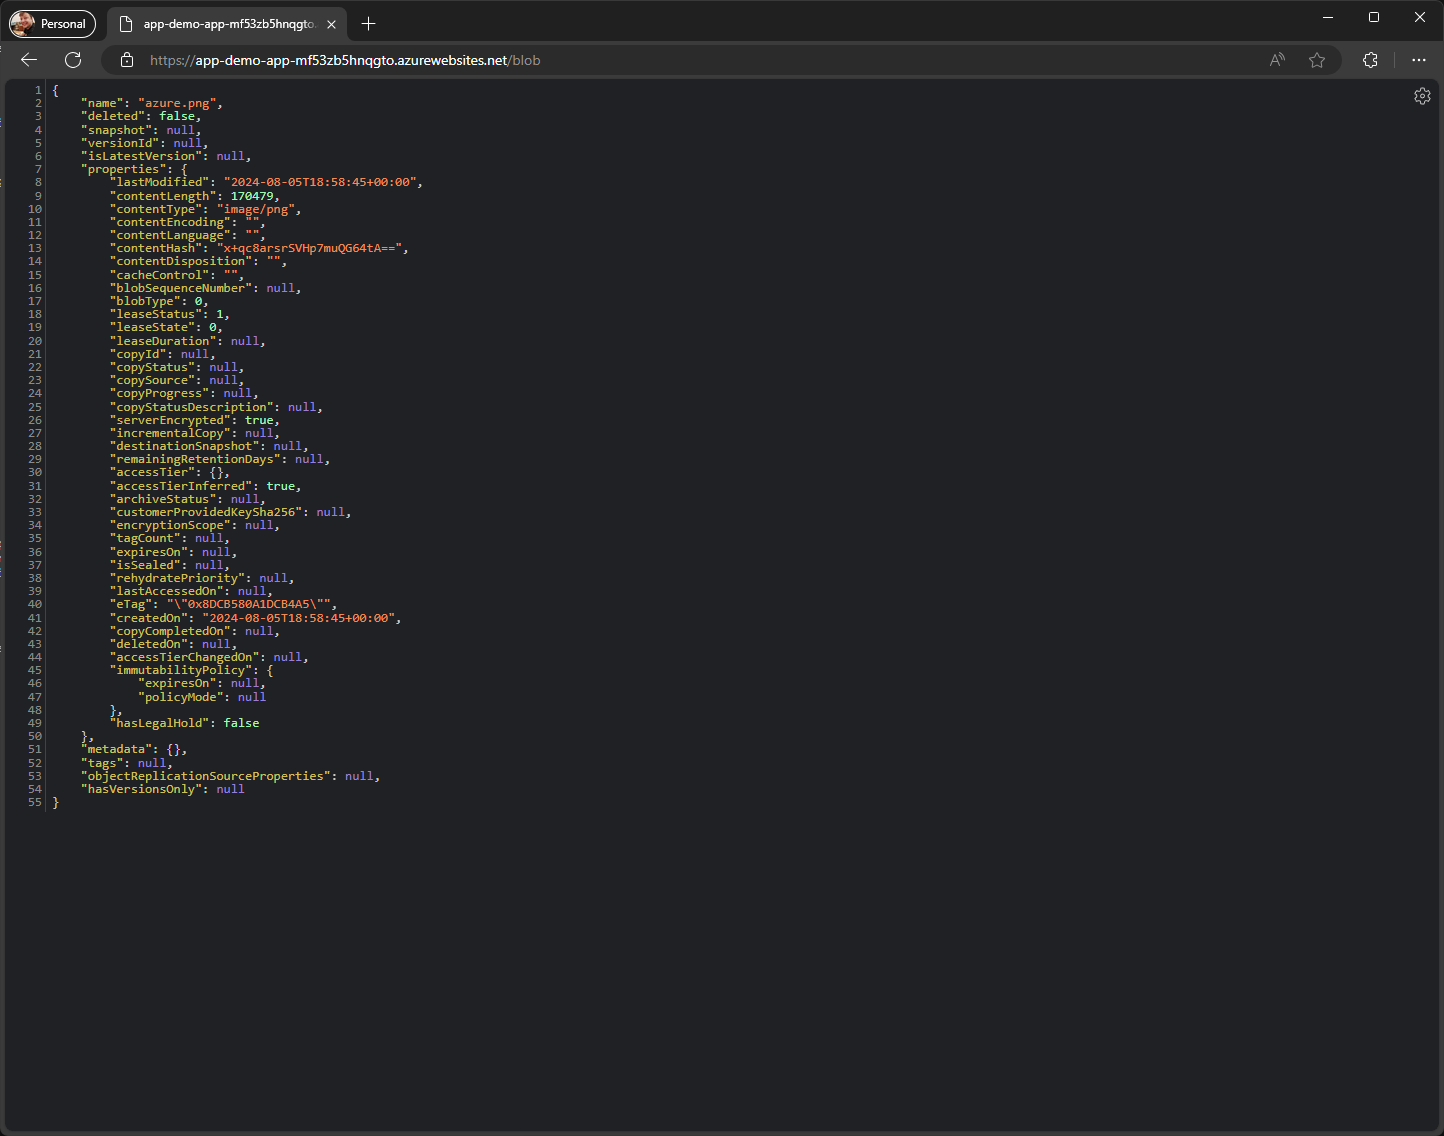
After uploading an item and upon refreshing the /blob endpoint, you’ll see data regarding the uploaded blob!

If you want to clean up your Azure resources after this blog post, you can remove the entire resource group by executing az group delete --name rg-azurite --yes.
Result and recap
And there you have it!
We have a working version of a .NET application interacting with Azure Storage services. Whether that’s emulated through Azurite or on a real Azure Storage Account.
We have accomplished this by running Azurite in Docker, generating a self-signed certificate, trusting said certificate and leveraging Azure’s DefaultAzureCredential mechanism. After the application was working in our containerized Azurite environment, we’ve set up the infrastructure required for an Azure Blob Storage service in the cloud as well as a place to host our .NET demo application. By using managed identities, we are able to communicate with our Azure Storage Account without storing any kind of credentials in our code. We no longer have to think about key rotation, security comprises or any other kind of password security issue.
We have followed these steps:
- Set up Azurite in Docker
- Set up a small .NET application capable of interacting with the blobs using the Azure SDKs
- Using the
DefaultAzureCredentialmechanism to authenticate to Azure services - Changing Azurite to support HTTPS
- Containerizing our .NET application
- Optimizing our containerization process and make use of environment variables
- Setting up, deploying to and interacting with an actual Azure Storage Account in the cloud
Finishing up
I hope you have enjoyed our journey through Azure’s wondrous worlds of SDKs, authentication and managed identities. Thank you for taking the time to read my blog posts and I hope it will help you out on your cloud endeavors!
As with all my blog posts, the full code is available in the repository of this site: physer.github.io.
Thank you and I’ll see you in the next one!
References
In order of appearance in the blog series.
- Azurite emulator
- DefaultAzureCredential
- What is HTTPS
- Docker Desktop
- Docker Compose
- OpenSSL
- OpenSSL Windows Binaries
- Azure Storage Explorer
- Azure account
- Azure CLI
- Docker storage documentation
- Docker’s documentation on persisting data
- Azure Storage Client Libraries
- Dependency injection for the Azure SDK
- Azure’s managed identities
- Azurite’s documentation on Github
- Docker’s multi-stage documentation
- Bicep documentation
- Azure App Service
- Azure’s built-in role definitions
- Bicep SDK reference
- App Service ZIP deploy documentation